Stylized GGX shading — toon specular highlights
To achieve a toon look in 3D rendering, the most common way is to threshold the lighting. It transforms the soft color gradients into flat colors.
// The rendering equation becomes:
float Threshold = 0.0; // any value between 0 and 1
vec3 Radiance = BRDF * LightIntensity * step(Threshold, dot(Normal, LightDirection));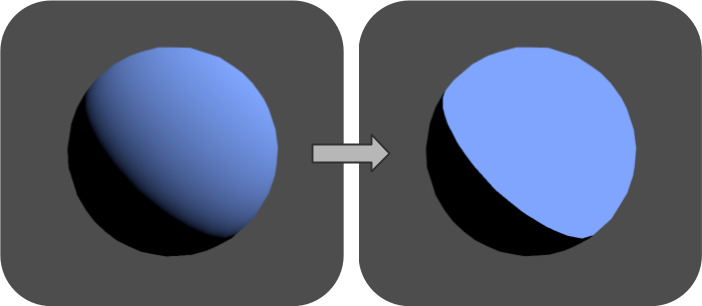

However, one might want to mix the 2D and 3D looks: big sharp highlights at low roughness and soft gradients at high roughness.
It feels more modern than classic toon shading, and we can rely on PBR for most of our shading, making everyone's lives easier (closer to energy-conservation, easier integration into existing pipelines, physically-based material calibration...).
I call this mixed approach "Stylized GGX Shading".
Many games have explored the combination of PBR and toon shading.
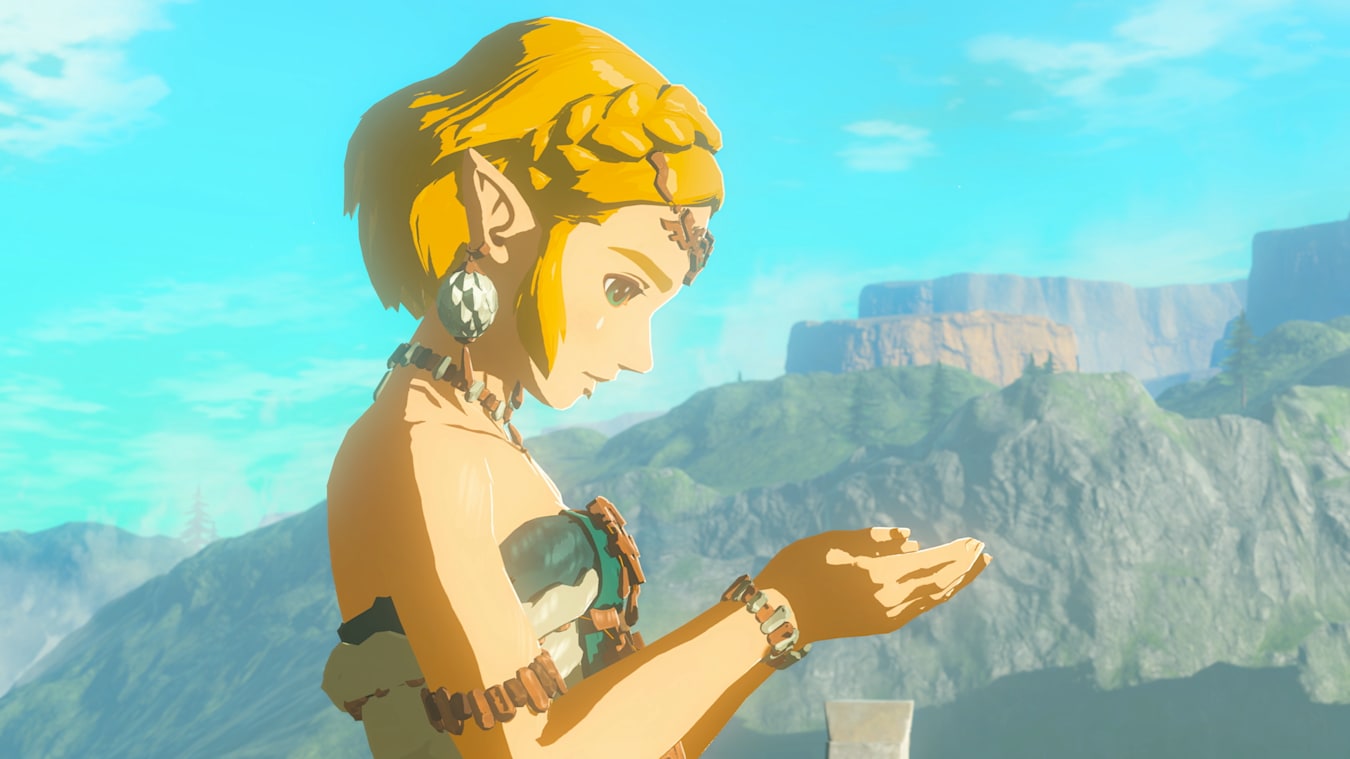
For example in Zelda: Breath of the Wild, the characters use pure toon shading but the environments rely more on a 3D / PBR look (not completely, e.g. the grass). This makes the characters pop out of the background.
Another example is Spellcasters Chronicles, which I had the chance to work on. During development we tested many things, including this "Stylized GGX Shading" I'm describing here. In the end we landed on something else, but it still uses a mix of 2D and 3D looks.

Simple version
The most common PBR model is the GGX Cook-Torrance microfacet model.
The surface's asperity is analytically modeled as a collection of oriented microfacets, and controlled by a roughness parameter.
The distribution of these microfacets' normals is described by the Normal Distribution Function (NDF).
Real-time engines usually use the Trowbridge-Reitz NDF, which looks like this:
// GGX Trowbridge-Reitz NDF
float D(vec3 Normal, vec3 HalfVector, float Roughness)
{
    float a = Roughness * Roughness;
    float a2 = a * a;
    float NdotH = max(dot(Normal, HalfVector), 0.0);
    float NdotH2 = NdotH * NdotH;
    float denom = NdotH2 * (a2 - 1.0) + 1.0;
    return a2 / (PI * denom * denom);
}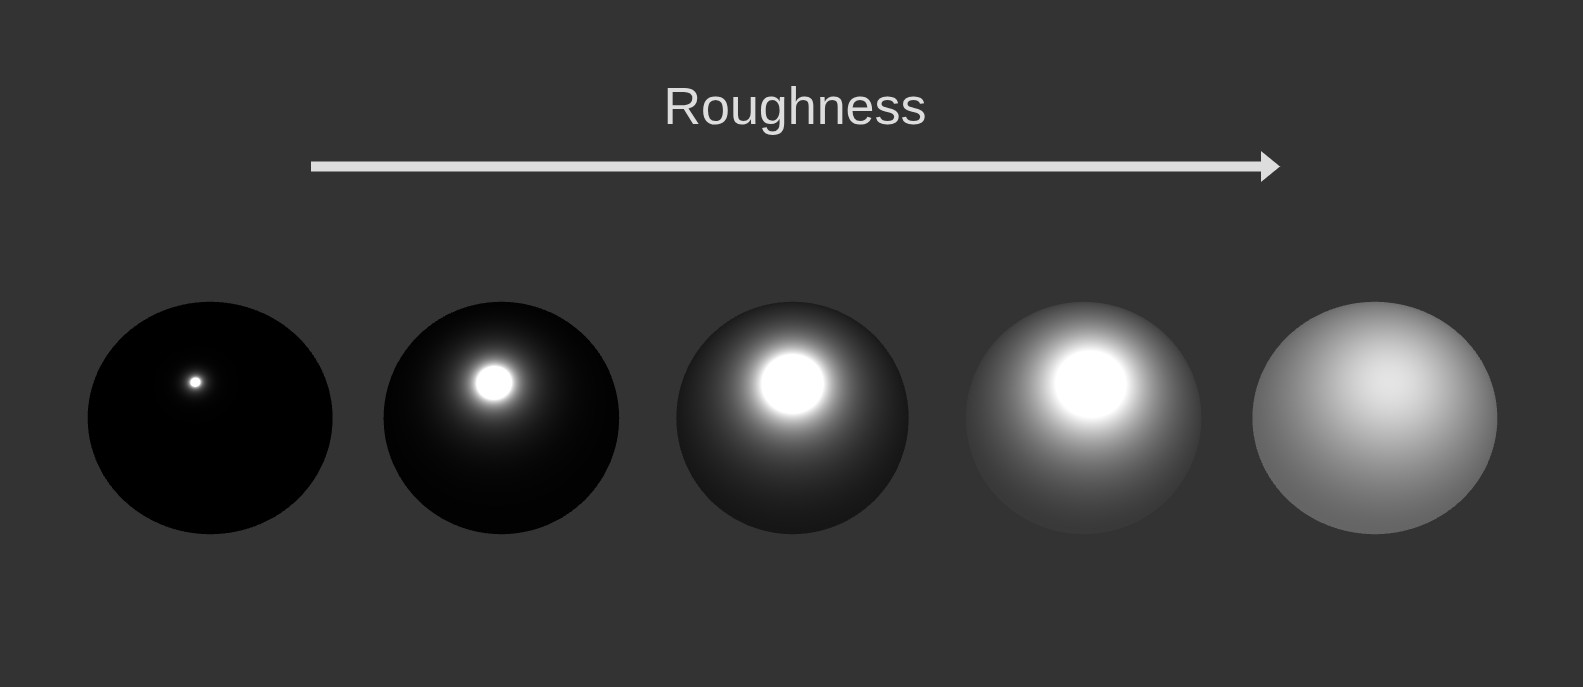
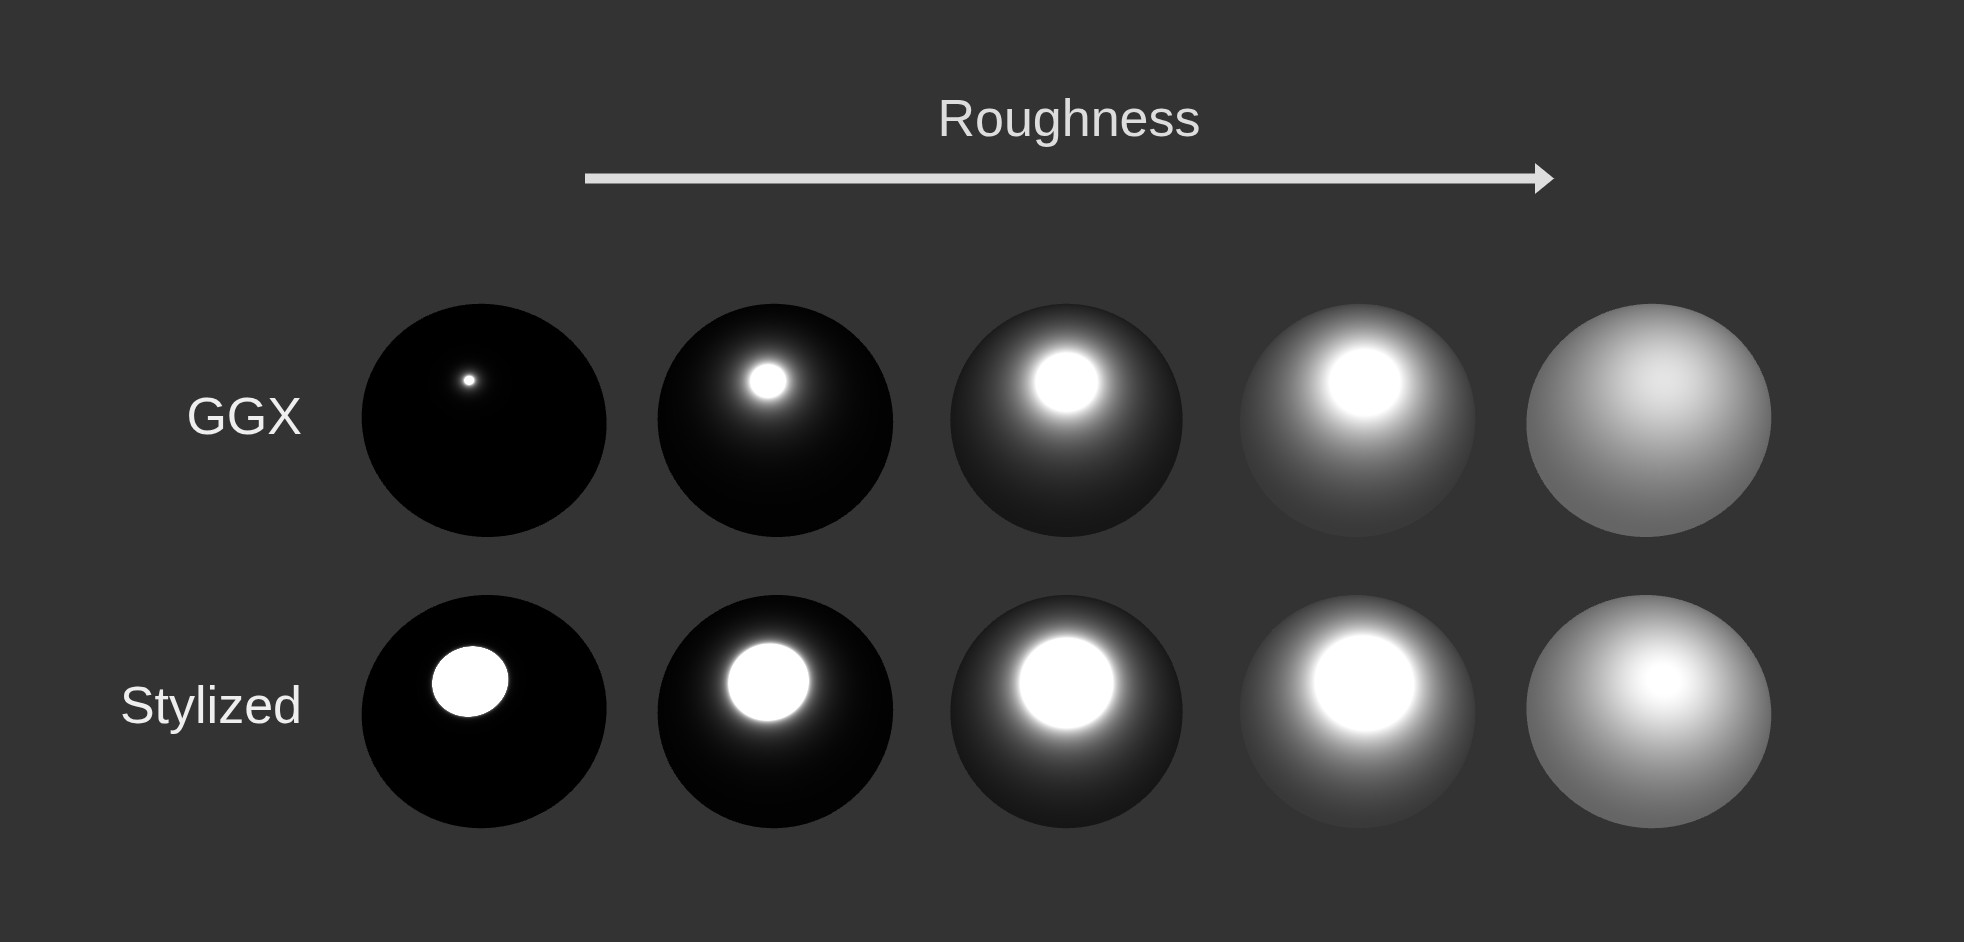
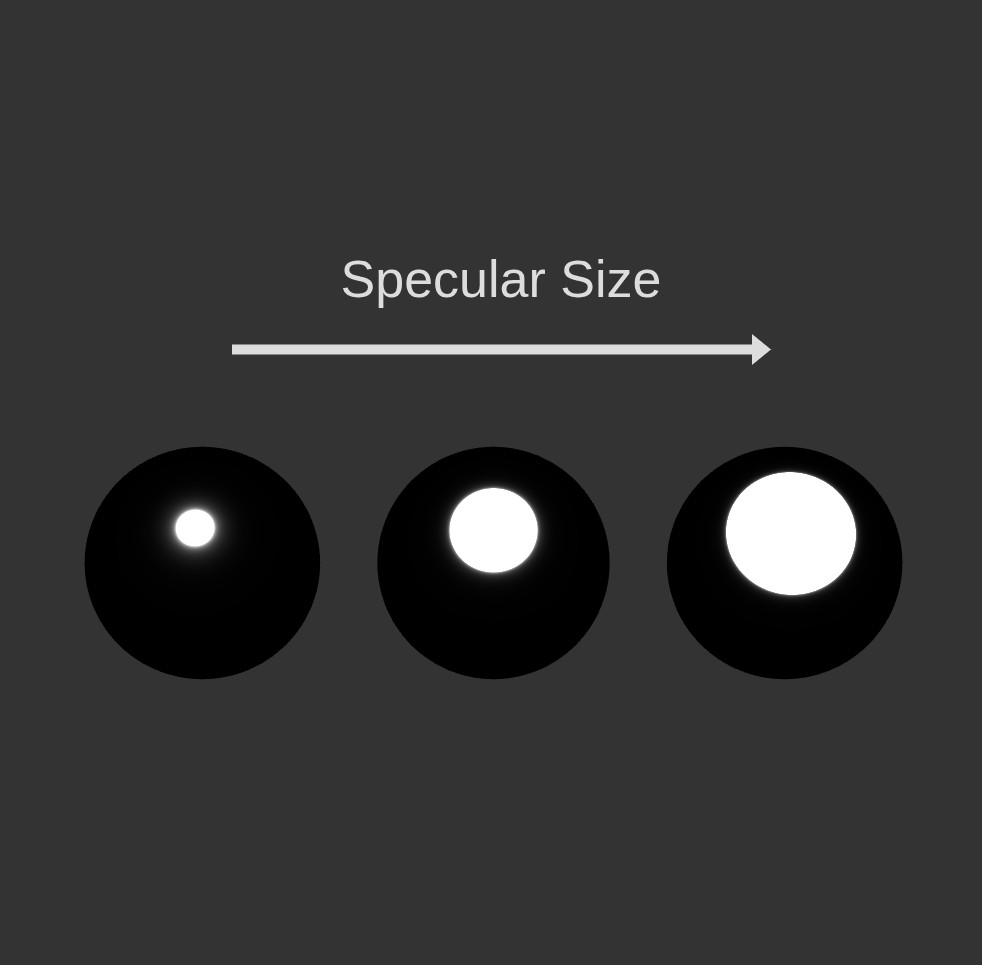
By slightly modifying this equation, we can expand the specular highlights.
// Stylized GGX Trowbridge-Reitz NDF
float D(vec3 Normal, vec3 HalfVector, float Roughness, float SpecularSize)
{
float a = Roughness * Roughness;
float a2 = a * a;
float NdotH = max(dot(Normal, HalfVector), 0.0);
float NdotH2 = NdotH * NdotH;
float denom = max(SpecularSize * NdotH2 * (a2 - 1.0) + 1.0, 0.0001);
return a2 / (PI * denom * denom);
}
I made a Desmos graph to visualize what's happening (follow the link to play with its parameters).
Abscissa represents the dot product of the surface normal and the half-vector (NdotH).
Ordinate represents the NDF value (the return value). Higher means more reflected energy.
Black curve is the original Trowbridge-Reitz NDF, red curve is the stylized one.
Our new "Specular Size" parameter allows us to return more energy at higher angles while preserving the original shape of the NDF.
Improved version
The simple version has the benefit of being extra cheap (1 mul and 1 max), but it impacts rough materials too much, making them appear overly bright.
Here is a slightly more complex equation that preserves the original NDF shape at high roughness, while still expanding the highlights at low roughness.
// Stylized GGX Trowbridge-Reitz NDF
float D(vec3 Normal, vec3 HalfVector, float Roughness, float SpecularSize, float GGXMatching)
{
    float a = Roughness * Roughness;
    float a2 = a * a;
    float NdotH = max(dot(Normal, HalfVector), 0.0);
    float NdotH2 = NdotH * NdotH;
    // The GGXMatching parameter controls how much the stylized NDF matches the GGX one at high roughness. In practice, 4 or 8 works well.
    float denom = max((SpecularSize * pow(1.0 - a, GGXMatching) + 1.0) * NdotH2 * (a2 - 1.0) + 1.0, 0.0001);
    return a2 / (PI * denom * denom);
}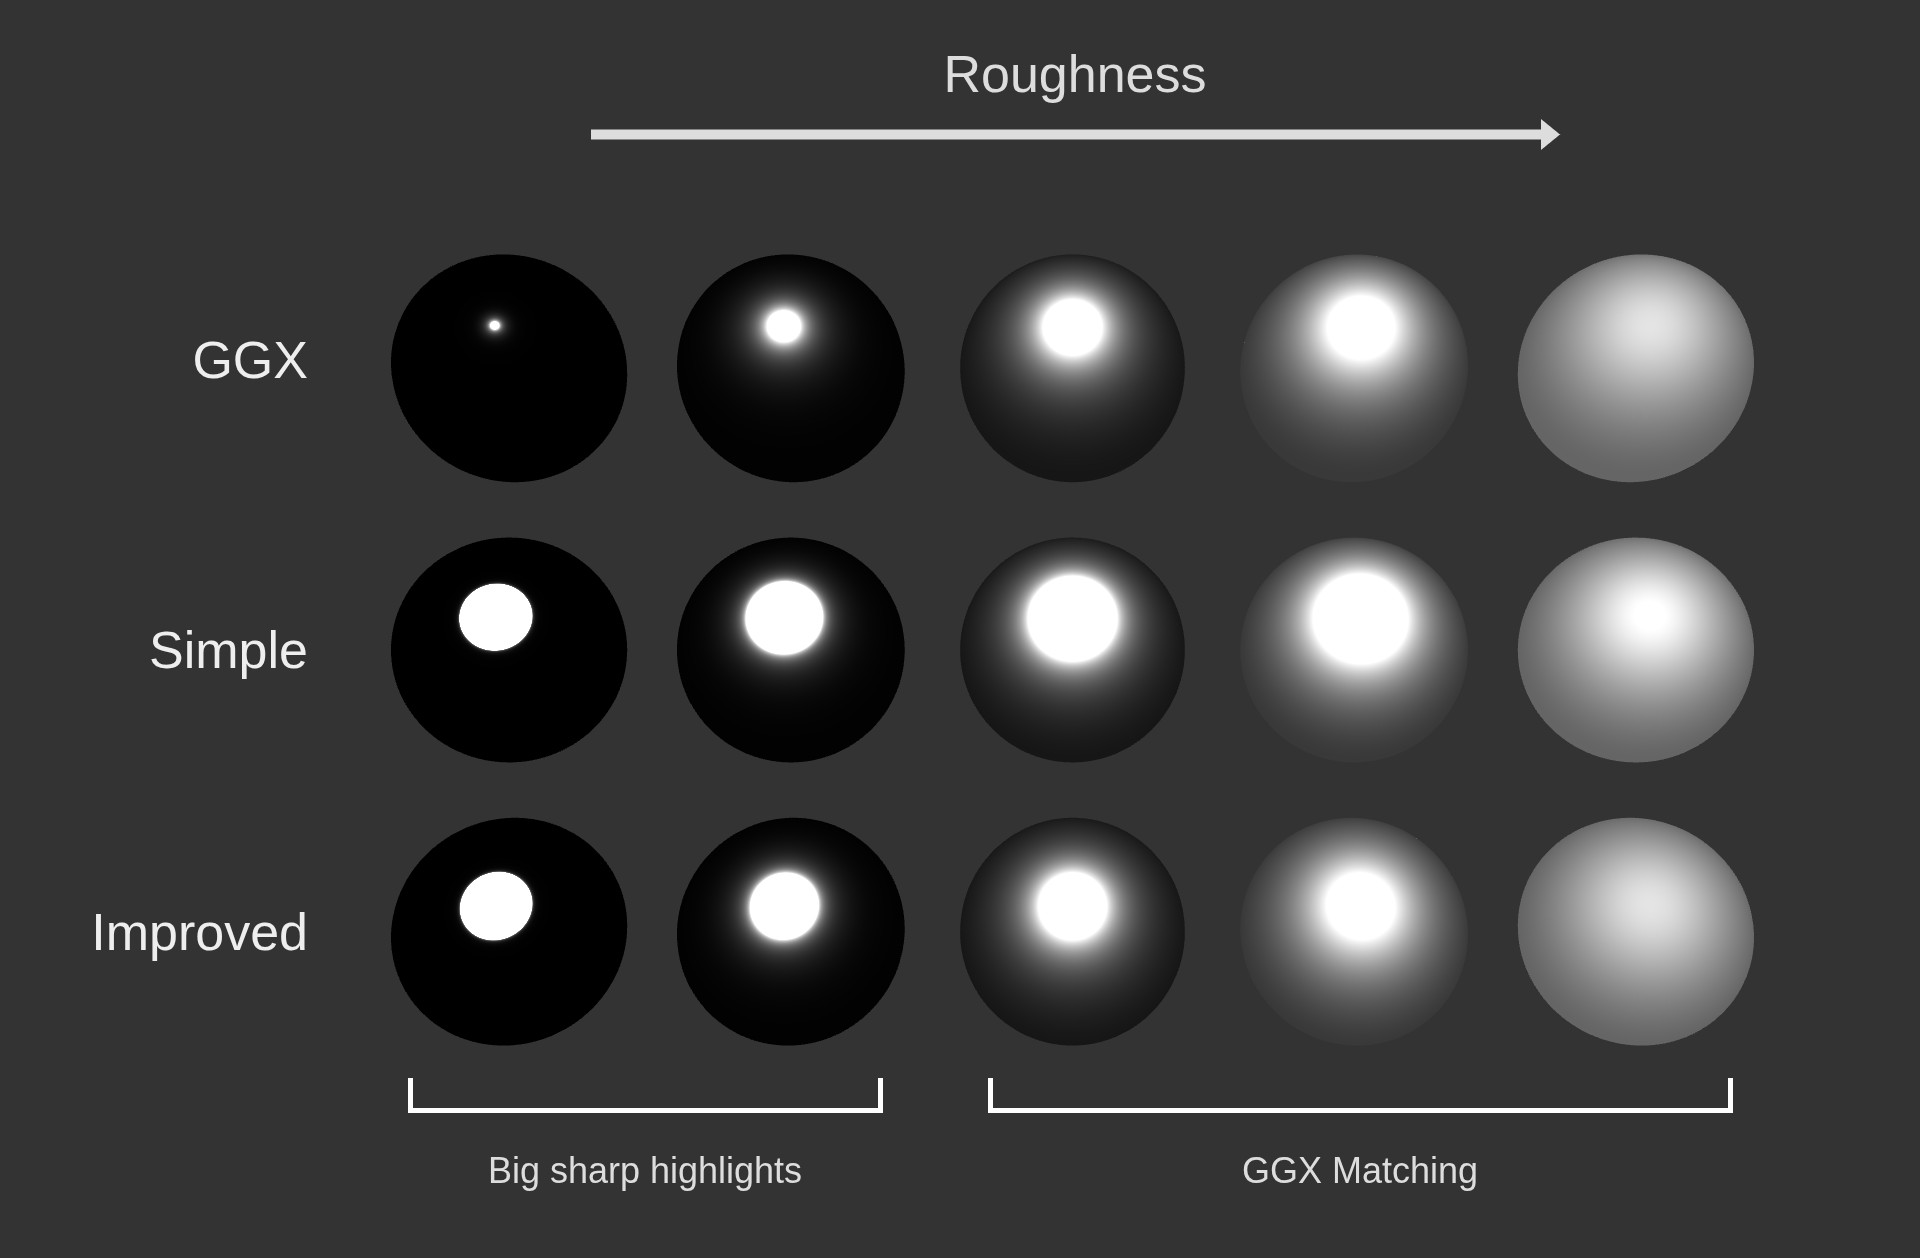
The last three columns better match the original GGX energy distribution.
Here is the graph animating the roughness (at high roughness the curves flatten).
Black curve is the Trowbridge-Reitz NDF, red curve is the simple stylized and green curve is the improved stylized.
The improved version matches the red curve at high roughness, and the black curve at low roughness.
Demo
Here is the final look under varying roughness, metalness and specular size.
Side notes
One might feel like this stylized GGX look is not "toon" enough.
On Spellcasters we tested many additions to this trick:
- Prune the GI probes by only computing 3 SH coefficients (global, up and down for the sky and ground) instead of our usual 9 coefficients. This lets us reduce the directionality, making it feel more like hand-drawn 2D art. It also saves performance as we can store fewer coefficients. The same kind of idea has been used in Hi-Fi Rush.
- Simplify the distant props using a mix of a depth-based Kuwahara filter, mip biasing, and simple fog.
- Rim lighting.
- Outlines and inlines.
- And of course, a lot of work went into the textures and modeling.